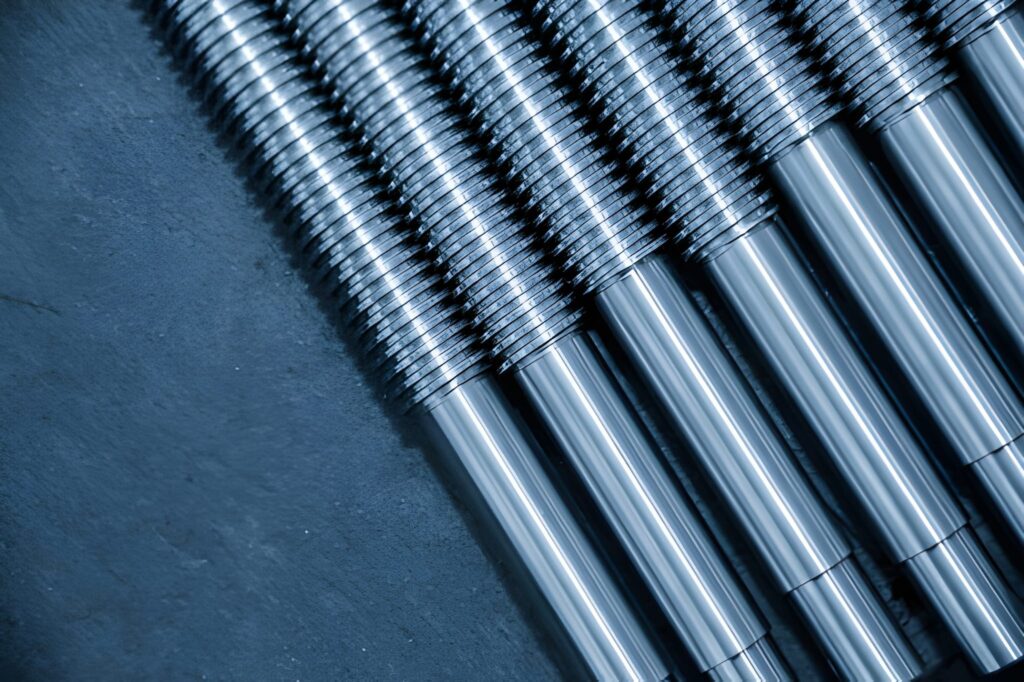
Thread milling creates threads using a rotating cutting tool on CNC machines. It's a dependable way to make precise threads in a variety of materials. You can use it well for both internal and external threads. The process works especially well when tapping the old way could cause problems.
We at ApexRapid are happy to help you with your thread milling needs. Our team uses modern CNC machines to make sure that the threads on your parts are perfect. We know that good threading is important for the performance of your assemblies and products. We're here to help you, whether you need parts for a prototype or a lot of them for production.
Let's talk more about the thread milling process, the different types of mills, and the things you need to think about to get good results.
Thread Milling
Thread milling creates threads using a rotating cutting tool on CNC machines. It's a dependable way to make precise threads in a variety of materials. You can use it well for both internal and external threads. The process works best when regular tapping may not be effective.
We're happy to help you with your thread milling needs at ApexRapid. Our team uses modern CNC machines to make sure that the threads on your parts are perfect. We know that good threading is important for the performance of your assemblies and products. We're here to help you, whether you need parts for a prototype or a lot of them for production.
There are a number of benefits to thread milling over traditional threading methods. It doesn't hurt materials as much and lowers the chance of tools breaking. You always get clean, precise threads that meet your needs. We use a variety of materials and thread types to meet the needs of your project. We want to help you make your manufacturing process easier and more reliable.
Thread Milling Process
It may sound hard to thread the mill, but once you see the steps, it's pretty easy. The process takes place on a CNC machine that precisely controls everything. We'll show you how it works so you know what's going on with your parts.
First, we make sure that your part is properly clamped to the machine. You need to get the area that needs threading ready correctly ahead of time. If you need internal threads, we drill a hole that is a little bigger than the inner diameter of the finished thread. We turn the shaft down to the right size for external threads. If you get these measurements right from the start, everything else will go smoothly.
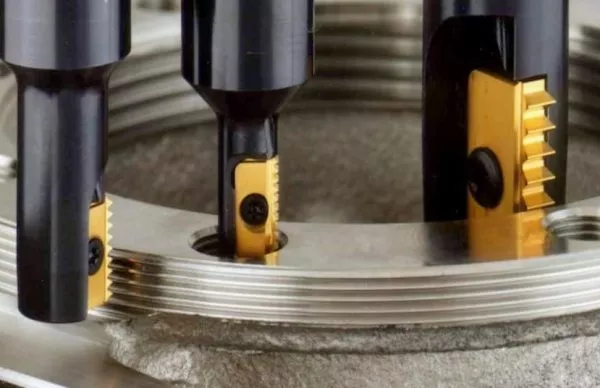
We pick a cutting tool that is exactly right for your thread needs. There are different thread mills for different sizes and types of thread. Some cutters can only cut one type of thread, while others can cut more than one. We choose the best one for your project. The way the tool is made affects how well your threads will work.
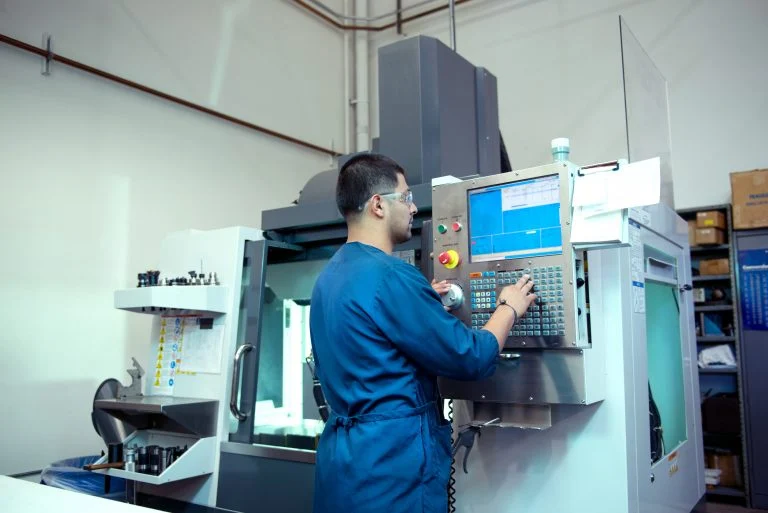
Operator Controlling a CNC Machining Operation
To make your threads correctly, the CNC machine needs directions. We program the tool to follow the exact spiral motion it needs to. This includes the pitch of your thread, how deep to cut, and how fast to cut. The machine figures out the helical path that makes the thread shape. Good programming ensures that the threads will always be well-behaved at the end.
The thread mill gets into place and starts to spin before it touches anything. It starts in the middle and moves outwards slowly for holes. Before we start cutting, we make sure everything is in the right place. To keep your part from getting damaged, the entry needs to be smooth. This careful start gets the whole threading process going in the right way.
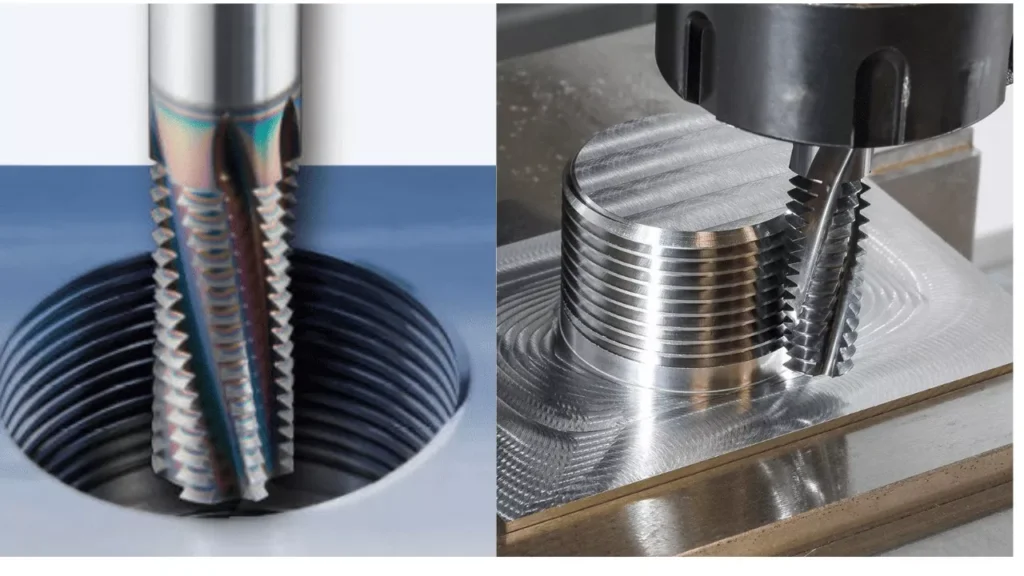
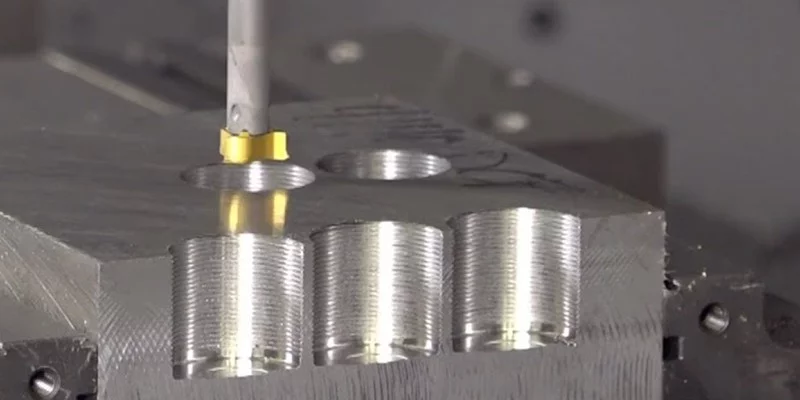
Milling Helical Circle Interpolation
As the tool follows its spiral path, the real work begins. It moves along the thread and spins at the same time. It moves forward one thread pitch with each full circle. Material is removed slowly until the thread profile is right all the way around. To get to the full thread depth we need, we sometimes have to make several passes.
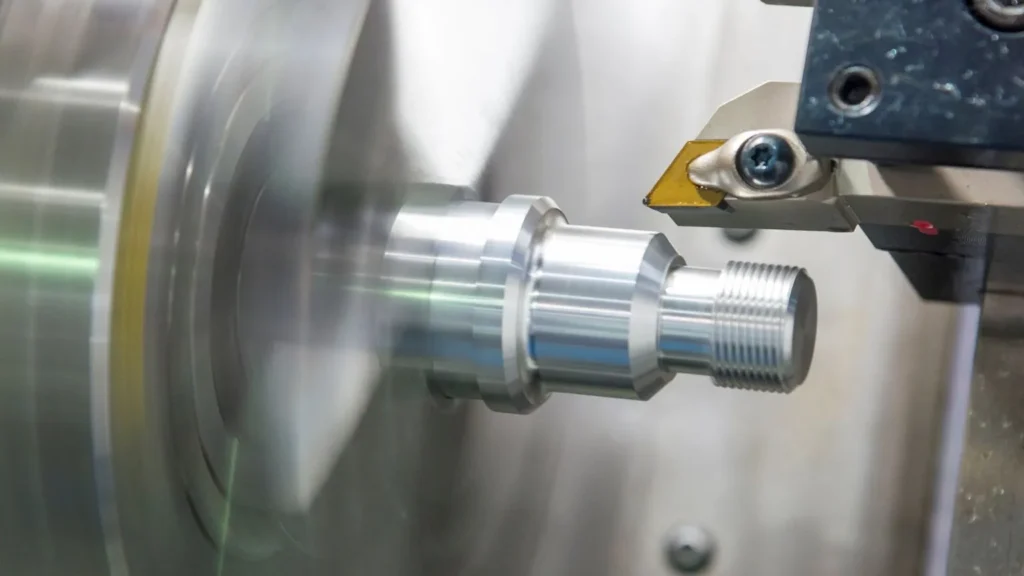
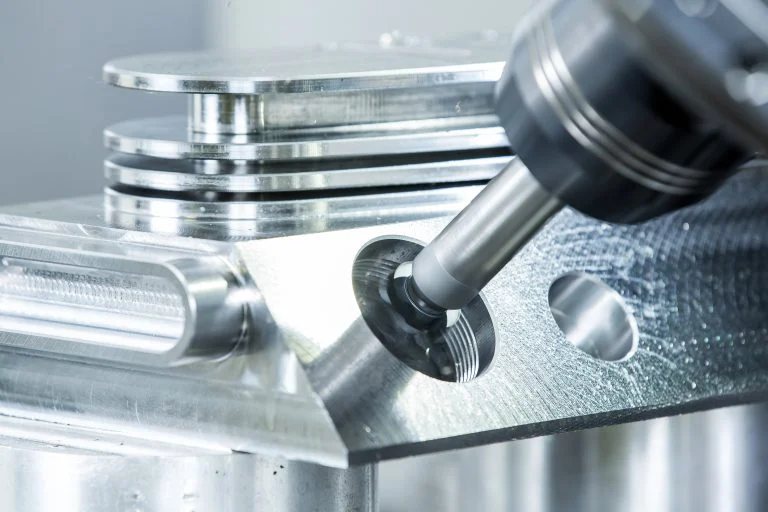
CNC Thread Turning
The tool pulls away safely once the thread is fully extended. The cutting goes on exactly as planned until it reaches the end. We are careful when we leave so that nothing gets damaged or marked. The tool pulls back cleanly without messing up the finished thread. Your threaded feature is done and looks good all the time now.
We don't just assume everything worked perfectly after machining finishes. Each thread gets checked with gauges to verify the pitch is correct. We measure the depth and examine how the profile turned out overall.
You might be familiar with standard milling operations, but thread milling is very different. All types of milling use rotating cutters, but thread milling has its own special way of doing things. Knowing these differences will help you understand why it's the best choice for some jobs. Let's see how it stacks up against other milling methods that you may have heard of.
Face milling makes flat surfaces by taking material off the top of your workpiece. Usually, the cutter moves across the surface in straight or curved lines. Thread milling, on the other hand, goes around a hole or shaft in a very specific helical path. Instead of just making a flat surface, it's making a specific thread form. The tool's movement and purpose are very different in these two tasks.
The end of the end milling tool cuts slots, pockets, and shapes into your parts. To shape features, the cutter moves in the X, Y, and sometimes Z directions. Thread milling uses similar cutters, but they move in a controlled spiral pattern that is controlled. It's only interested in making threaded features with the right pitch and depth. End milling shapes general features, while thread milling makes functional threads.
When you slot mill, you cut straight lines into the material to make narrow channels or grooves. The tool goes down and moves in a straight line to make the slot shape. Instead, thread milling moves in circles while also moving along the axis. Instead of a straight channel, it's making a continuous helical groove. The way the motion works makes thread milling a lot harder than just cutting slots.
Profile Milling
Profile milling follows the edges of complicated shapes on the surface of your part. The tool follows the curves and shapes of your design needs exactly. Thread milling also follows a set path, but it does so in three dimensions around a cylinder. It is making a standard thread form instead of a custom profile shape. Both need to be precise, but thread milling has stricter size requirements for a good fit.
Shoulder milling makes square corners and surfaces that are perpendicular to each other quickly and easily. It cuts the face and the side at the same time to make these features in fewer passes. Thread milling doesn't make shoulders at all; it only does threading. There are big differences in the tools, speeds, and methods used in these two ways. Each one has a specific job to do when it comes to machining.
Thread milling is different because it uses both rotation and helical interpolation movements at the same time. While cutting around the thread axis, the tool must keep the exact pitch. This makes the threads fit together properly, which is necessary for bolts and screws to work. This level of synchronized motion and accuracy isn't needed for other types of milling. That's why thread milling always needs special tools and careful programming.
The type of thread mill you choose will affect both the quality of your threading and how quickly you can make things. Different designs can help you solve different problems that come up during manufacturing. Knowing what each type does best will help you choose the right tools. Let's look at the real-world differences between the different types of thread mills.
One small cutting tooth is used by single-point thread mills to slowly carve threads. The tool goes around the hole several times, cutting deeper each time. You can drill holes from 6mm to 30mm with just one tool because it is flexible. It's great when the parts in a batch have different thread sizes. The downside is that it takes longer because the tool needs to make several circuits to finish each thread.
There are several teeth stacked vertically along the body of a multi-point cutter. As the tool spirals through, each tooth takes off a little bit of material. Threading goes much faster because several teeth work together at the same time. These cutters are good for production settings where you make the same thread over and over. Keep in mind that each cutter can only work with one thread pitch and diameter combination.
Full-form thread mills look like the thread you're making right on the cutter. The whole thread profile cuts in one helical pass all the way around the hole. If speed is the most important thing to you, this is the fastest way to thread. Automakers love these for production lines that run all day at high speeds. But you'll need a different cutter for each thread specification, which will cost you more in tools.
Adjustable Thread Mills
You can set the exact diameter you need on adjustable thread mills within a range. The tool body has small screws that let you move the cutting inserts in or out a little bit to make adjustments. This means you don't have to keep dozens of fixed-size cutters in your tool crib. They're especially helpful for prototype shops that work with custom threads regularly during projects. It takes a little longer to set up, but the flexibility usually makes up for that time.
Solid carbide thread mills are made from one piece of very hard carbide material. When you thread tough materials like stainless steel or titanium, they stay sharp for a lot longer. The rigidity stops bending, which makes the threads more accurate, especially in deep holes. Yes, they cost more at first, but you won't have to replace them as often over time. We suggest these for consistently threading materials that are harder than 30 HRC in production.
Coated thread mills carefully get thin layers of ceramic applied to them using vapour deposition methods. These coatings make the surface non-stick, which cuts down on heat and friction a lot while cutting. The tool lasts about three times longer than uncoated versions, and your threads come out cleaner. The coating also helps when threading sticky materials like aluminum that tend to stick to cutters. It's a good upgrade that quickly pays for itself by making tools last longer.
There are different ways to do CNC thread milling, depending on what you want to accomplish. Each method has practical benefits for certain threading situations you'll come across. Knowing which method to use saves time and makes your thread quality much better. Let's look at the main methods that machinists use to do thread milling jobs well.
Using the CNC's axes, interpolation threading moves the tool in a coordinated helical path. The machine automatically syncs circular motion with linear movement for you the whole time. This makes threads that are smooth and continuous without having to stop or move the cutter. This is the most common method because modern CNC controls can do the math easily. Once the program runs correctly the first time, you always get the same threads.
Climb milling moves the tool in the same direction as the cutting edge. This makes the cutting forces weaker and gives your threads a better surface finish, especially. Instead of getting stuck in the thread form, the chips flow away from the cut. Because there is less rubbing and heat generation while the tool is in use, its life is longer. We use this whenever we can because it gives us cleaner results and lasts longer.
Instead, conventional milling feeds the tool in the opposite direction to the cutting edge's rotation. This method is better for older machines or materials that become harder when they are under stress. The cutting action is more aggressive, which helps it get through tough surface layers at first. You might see finishes that are a little rougher than what you usually see when climbing milling. It's helpful if you need more cutting force or if your machine isn't very stiff.
With single-pass threading, you only need to make one helical circuit to get the full thread depth. This is the fastest way to do things if your cutter design clearly allows it. This method is mainly used by full-form and multi-point thread mills to make things more efficient. To avoid problems with deflection, the tool must be sharp and the setup must be strong. When the conditions are right, you'll be able to thread parts very quickly and with perfect consistency.
Instead of cutting the thread all at once, multi-pass threading cuts it slowly over several helical circuits. Each pass takes away a set amount of material without putting too much stress on the cutter. This method works well for tougher materials or when using smaller single-point thread mills safely. It cuts down on heat and cutting forces, which protects both your tool and your workpiece very well. You will have more control and your tools will last longer overall, but you will spend more cycle time.
During the helical path, peck threading pulls the tool back every so often to get rid of chips. This stops chip packing in deep or blind threaded holes, which would otherwise cause problems. The tool moves in, cuts a piece, backs out a little, and then keeps going in a spiral. It's important for materials that make long, stringy chips, like aluminum or copper alloys. The extra movement takes longer, but it stops chips from damaging the thread completely.
High-speed threading makes the spindle and feed rates go a lot faster than normal settings do. This method is now possible thanks to modern carbide tools and rigid machines. Surprisingly, you can thread parts in a fraction of the normal time without losing quality. At these speeds, though, proper coolant delivery and tool coatings are very important. It's great for places where cycle time has a big effect on how much money you make.
Using proven best practices makes thread milling safer and more productive for you. These tips are based on real-life experience with solving common threading problems in a good way. Using them helps you avoid making expensive mistakes and always get better results. Let's talk about the most important things to do to make thread milling work.
Before you start threading, always pre-machine your holes to the right size. For internal threads, drill a hole that is just a little bit bigger than the thread's minor diameter. If you do this wrong, your thread mill won't be able to make the right thread shape. Before you start, make sure the hole size is correct by checking your thread charts and using measuring tools. Honestly, this easy step stops most threading problems from happening in the first place.
Carefully match the spindle speed to the material of the cutter and the workpiece you're threading. Carbide thread mills usually go faster than high-speed steel thread mills. Harder materials need slower speeds to keep tools from wearing out too quickly. If everything looks good while you're cutting, start slowly and speed up gradually. Proper speeds always give you a better surface finish and longer tool life.
A good flow of coolant keeps the temperature down and flushes chips away from the thread. Point the stream of coolant directly at the cutting point, where the most heat is generated. Through-spindle coolant works great for deep holes that are hard to get to most of the time. Unfortunately, not enough cooling causes the surface to be rough and the tools to wear out quickly. Don't skip this. Using the right coolant always makes a big difference in the quality of the threads.
Start with moderate feed rates until you're sure everything is working right. Aggressive feeds can quickly overload small thread mills, causing them to bend or break. You can slowly raise the feeds once you see good chips and threads that are straight. Listen to the machine; strange sounds are often a sign of trouble before you can see any damage. It's better to take your time and do it right than to rush and break things.
When a tool runs out, it cuts unevenly and makes threads that are hard to diagnose. Whenever you put in a new thread mill, use a dial indicator to check for runout. Too much runout makes one side of the cutter wear out faster than the other. It also makes threads that aren't round, which means they won't fit gauges or other parts that need to fit together properly. If you keep runout under 0.01mm, your threads will always be right and the same.
In the CNC program, make sure your thread mill has smooth entry and exit moves. If you start or stop suddenly, you might leave marks or damage the thread's beginning or end. A gradual helical approach keeps the delicate cutting edges from getting shocked. The lead-out should also be smooth so that there are no tool marks at the end of the thread. These programmed moves only take a few seconds, but they do a lot to keep the quality of the thread high during production.
Check the quality of the threads carefully before the job is done. Use thread gauges or plug gauges to carefully check the first few parts. Check the pitch, depth, and overall fit to make sure everything is exactly how it should be. Unfortunately, catching problems early saves you from having to throw away whole batches later. You can be sure that your process stays under control all the time if you check it regularly.
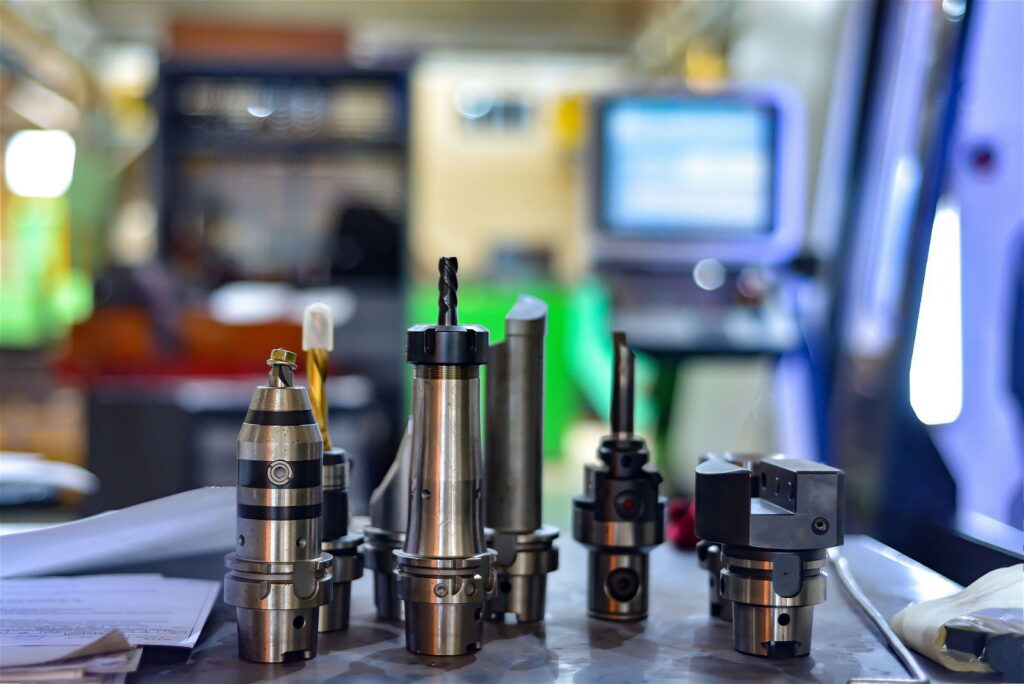
Milling Tools
When the mills are dull, they don't make a good surface finish and need more cutting force. Before they start to noticeably affect the quality of the threads on parts, replace or resharpen the cutters. Sharp tools cut cleanly, produce less heat, and get rid of chips better. Keep an eye on the life of your tools and set up replacement schedules based on how well they are working. New cutters make it easier and more reliable for everyone to thread.
Keep CNC programs and cutting settings for threads that you make often. This takes away the need to guess and cuts down on setup time on repeat jobs by a lot later on. Make sure to write down what went well or what problems came up during the first runs.
We're ready to help with your precision threading needs today. Our CNC equipment handles thread milling for various materials and specifications. You'll receive accurate threads that meet your assembly requirements reliably.
Contact us to discuss your project or get an instant quote now.

HDPE VS. PP: Strength, Machinability, and Applications

Brass Vs Copper for CNC Machining: Which Material Is Best

CNC Plastic Machining: Plastic Selection, Machining Processes & Key Applications

A Complete Guide to Aluminum Sheet Metal Fabrication

Deep Hole Drilling: What It Is & How It Is Done?

Rapid Prototyping: All About Process, Techniques, Pros & Challenges & More