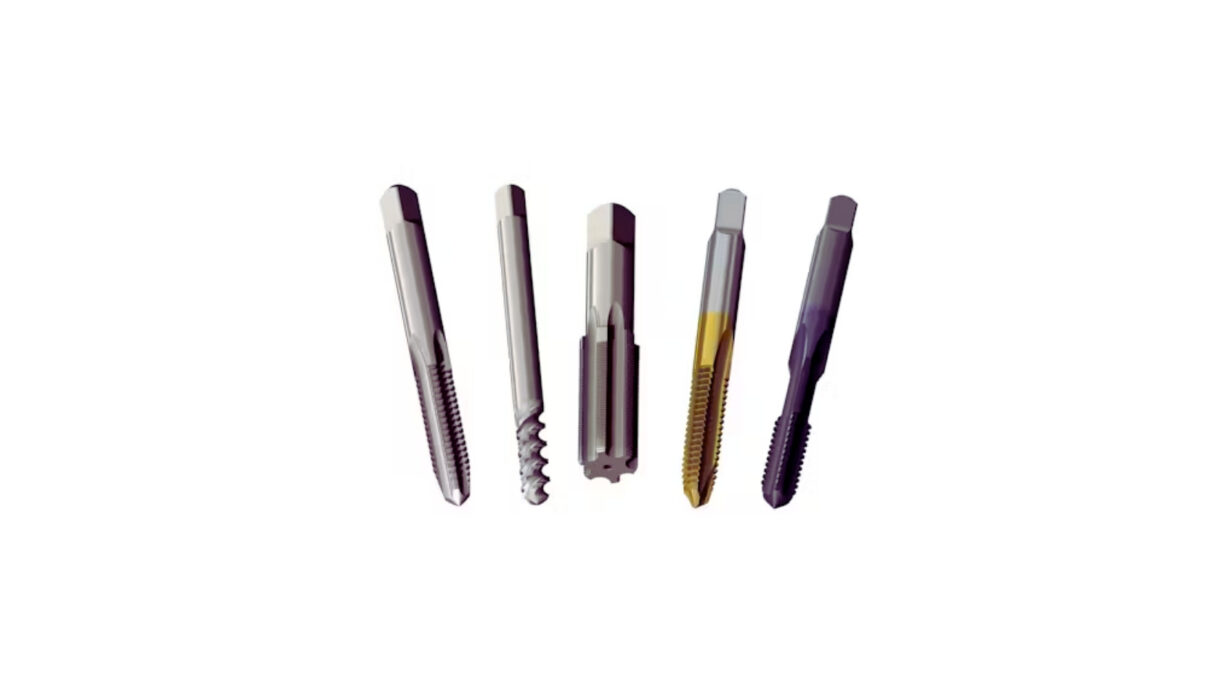
Taps are essential tools for creating internal threads in holes. They cut grooves inside metal or plastic parts to accept bolts or screws. Understanding tap types helps you choose the right tool for your machining needs.
Different taps suit different materials and thread forms. Some taps work better in soft metals, while others handle harder alloys or plastics. Using the correct tap reduces tool wear and improves thread quality.
Choosing the right tap also affects the speed and ease of machining. Some taps cut faster but need more careful setup. Others offer stronger threads or better chip control. Knowing these differences helps you get the job done efficiently.
Taps are of various kinds to perform the various threading operations. The preference should be based on the type of holes, material, and type of finish in the thread. Knowledge of these types will assist you in maximizing threading quality and tool life.
HSS Taper Tap
Taper taps are graded at the tip. This assists in threading easily through a drilled hole. They are perfect with regard to through holes and novices.
The soft taper lowers tool binding. It is also used to ensure that the tap is guided well into the hole. Taper taps are used when an engagement of threads should be started gradually.
Plug taps are shorter than a taper tap. They cut threads more readily and are applied to through and blind holes. These are taps that have a compromise between start ease and full thread depth.
They are the most common general-purpose taps. Plug taps are very general and are effective in most materials. When you require quicker threading and high-quality thread, use them.
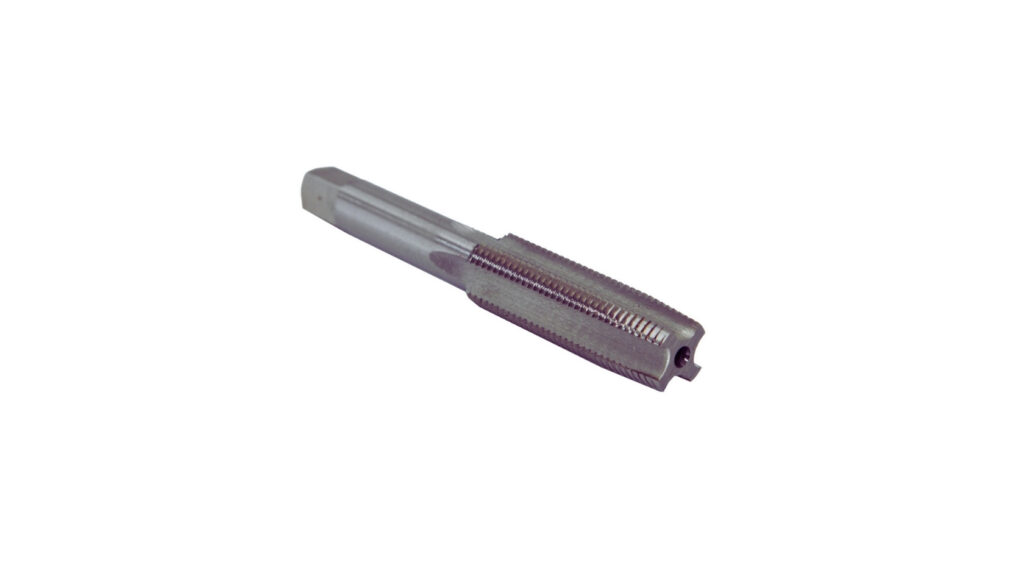
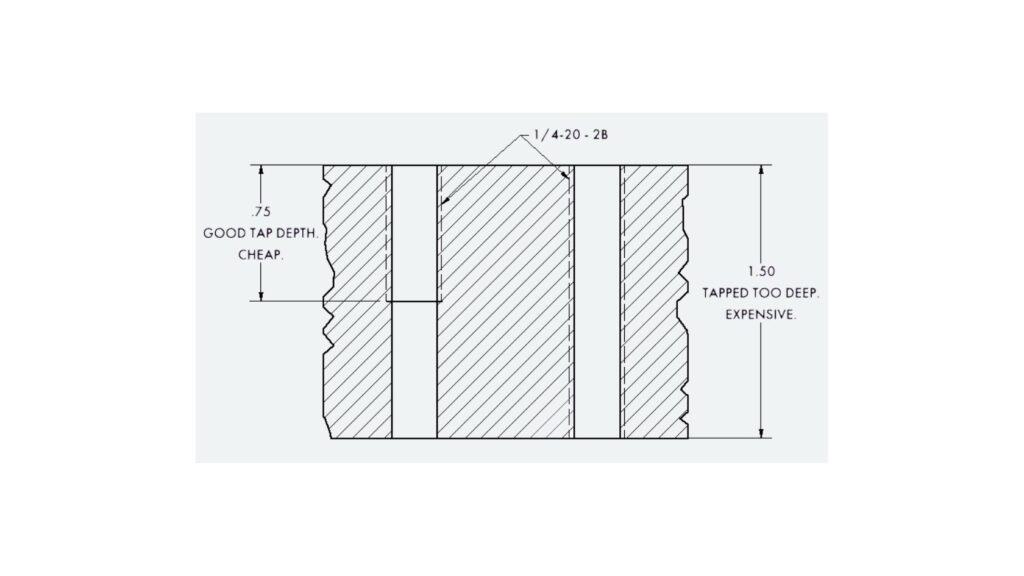
Bottoming Tap
Bottoming taps are virtually tapered at the tip. They trim threads near the bottom of blind holes. This is necessary in threading close to the end of the hole.
To get the most thread length in a blind hole, use bottoming taps. These also need a pre-tapped beginning by taper or plug taps. To proceed with care so as not to break the tools.
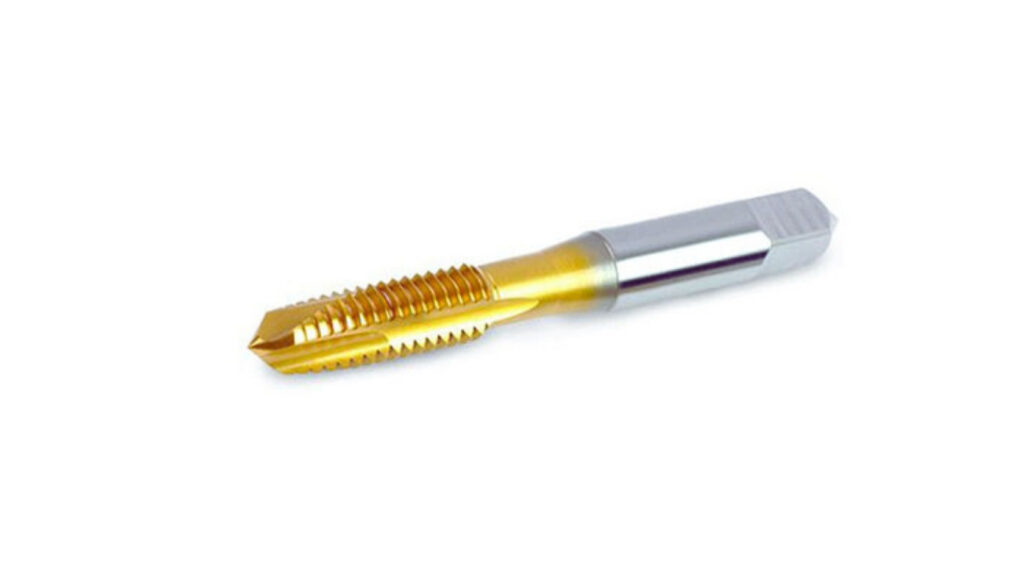
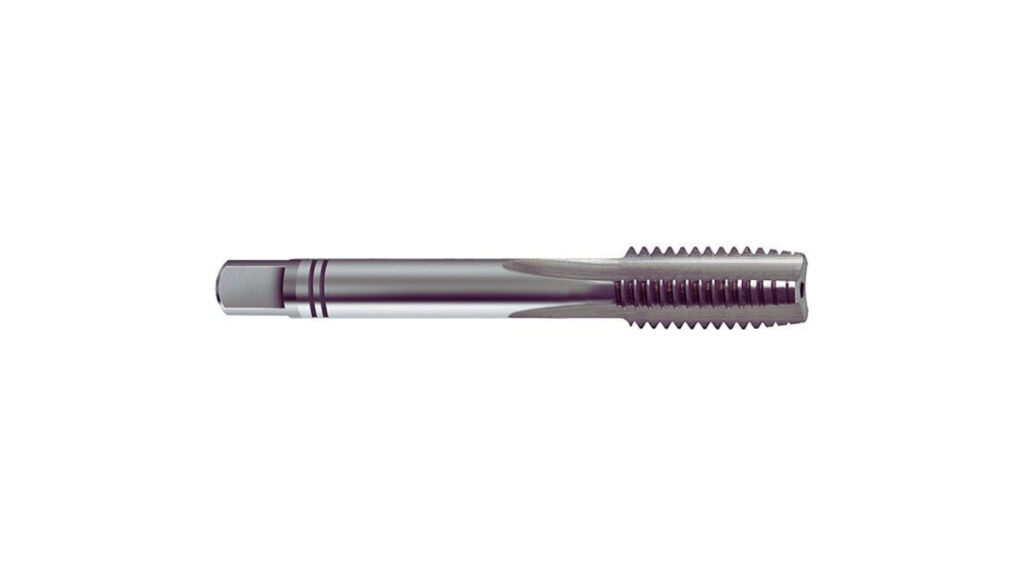
TiN Spiral Point Taps
The taps used in a spiral point are pushing chips out of the hole. This enhances through-hole chip evacuation. They decrease the chances of clogging chips and enhance threads.
Apply through holes and softer materials with the use of spiral point taps. Its design makes it faster and efficient in tapping. They need an optimal setup on their machines.
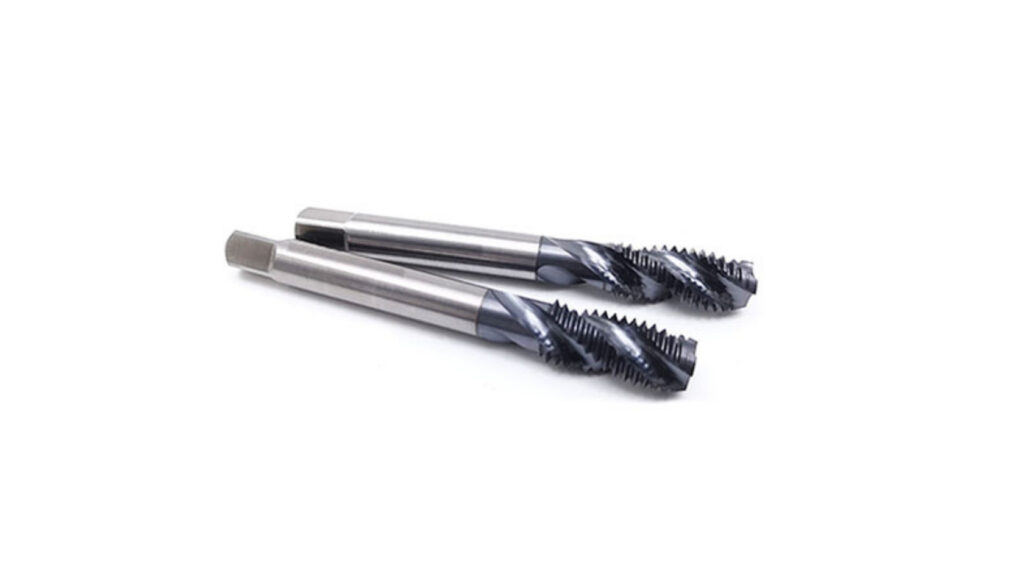
A Pair of Spirals Flute Tap
Chips are extracted from blind holes by spiral flute taps. The flutes are spiral like a drill. This prevents chips from jamming into the bottom.
They cut effectively in deep or blind holes, under heavy chip loads. Apply spiral flute taps on long, stringy chip materials. That requires a correct coolant flow to control the chip.
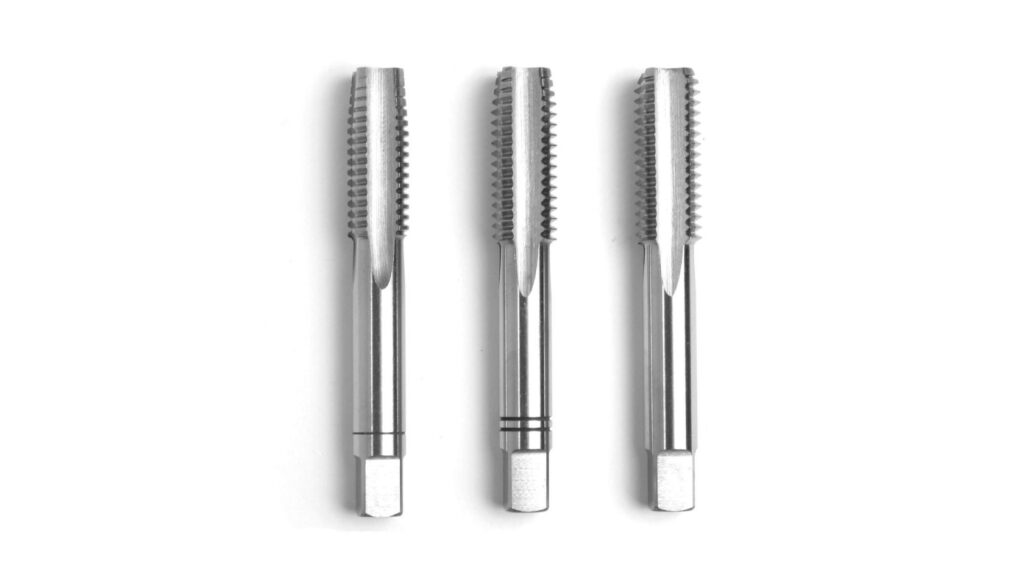
3 Hand Taps
Hand taps are hand-threaded. They usually come in sets with taper, plug, and bottoming taps. Their sharp edges are so adapted to slower and moderate tapping by the hand.
Hand taps are used when precision and control are more important. They are popular for maintenance and repair. Tool life should always be extended through cutting fluid.
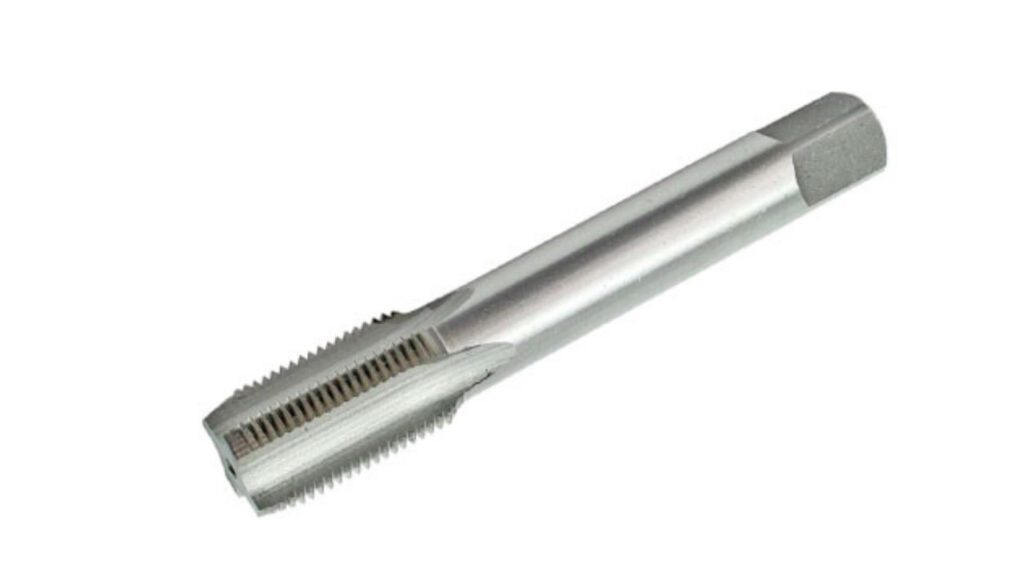
A Machine Tap
Machine taps are to be used in CNC machines and power tools. They are highly accurate in geometry and high-speed threading. Spiral point (also known as flute) can be found on machine taps.
These are very rigid to install and need accurate speeds so that they do not break. When making it, use machine taps so that the thread quality and speed remain consistence.
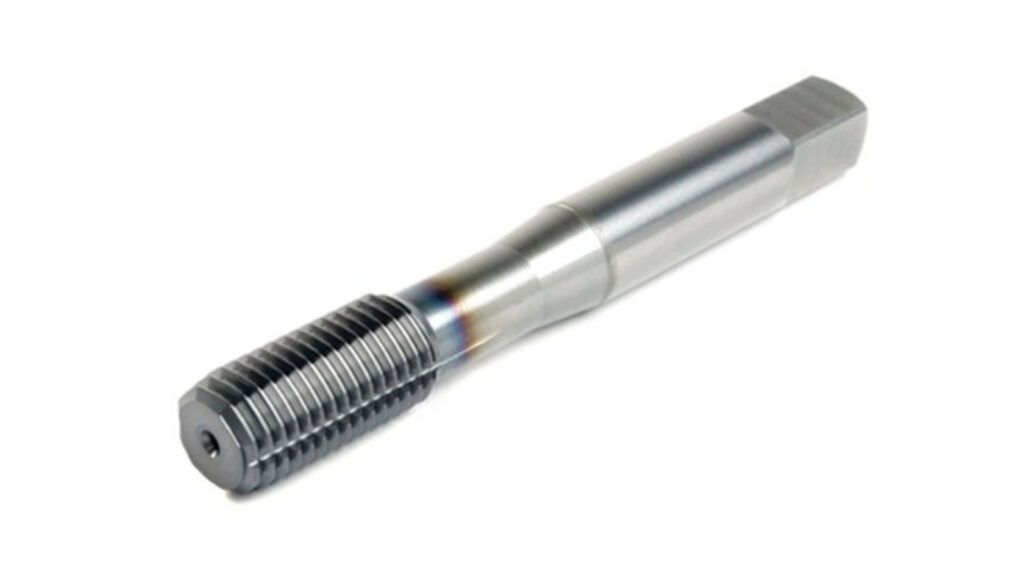
A Forming Tap
Tapping inserts threads by pushing material as opposed to cutting it out. They make the thread stronger and not chips. The forming taps are most effective on ductile materials.
Apply forming taps that would give better thread strength and surface quality. They require the correct sizes of holes and lubrication. On brittle or hard material, avoid forming taps.
Using the right tap will mean clean threads and protruded tool life. Refer to material type, hole depth, thread specification, and machine setup. These are the factors that will point you in the right direction to the best tap that suits your application.
Such soft metals as aluminum and brass are suitable when standard plug or spiral point taps are used. More tough materials require tougher coated taps or flute designs, such as spiral flutes to handle chip control and wear.
Wrong tap material or design will result in the risk of breakage. Care should always be taken to ensure that the material recommendations of manufacturers are adhered to.
Tap Thread Design
On through holes, spiral point taps will assist in pushing chips through and cleaning the hole faster. Blind holes have to use spiral flutes or bottoming taps to clear chips and cut threads at the bottom.
Selecting the correct tap type eliminates the problem of chipping.
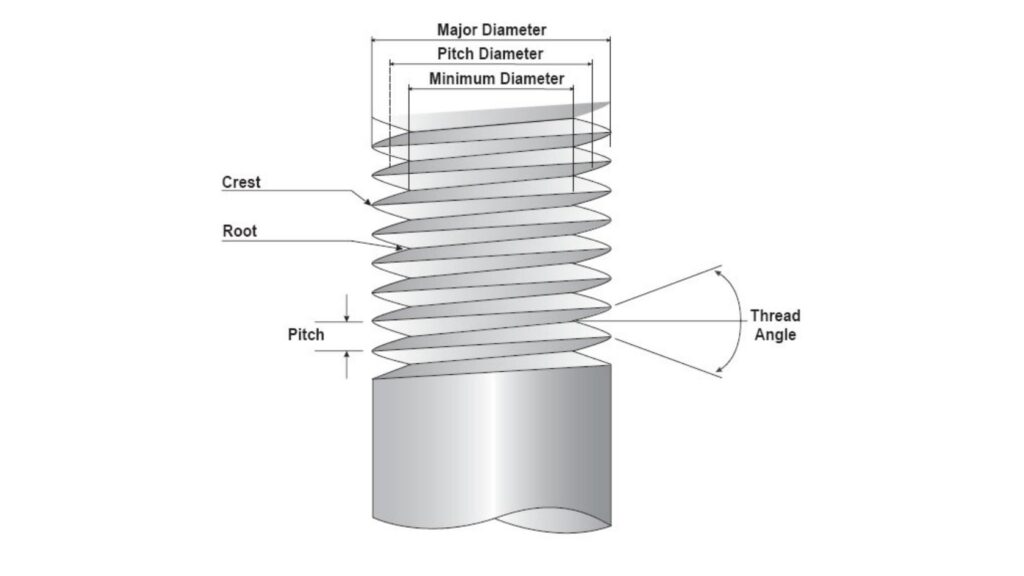
Thread Diameter and Pitch
Make sure that the taps that you use are the same size and pitch of the thread that you need. Poor fit or weak threads are a result of incorrect pitch. Accuracy is critical, particularly in the case of fine or metric threads.
Before machining, tap markings and charts must always be checked.
The tapping method by hand needs other tap selections compared to CNC machining. Machine taps are fast enough and have accurate geometrical forms. Hand taps are controlled at the expense of speed.
Lubrication lowers friction, heat, and wear of tools in tapping. Apply the right cutting fluids that suit your material and tap. Appropriate lubrication will enhance a better finish on the thread and also increase the life of the tool.
Absence of lubrication adds to the likelihood of breakage and the poor quality of the threads.
Tapping issues can lead to poor threads, broken tools, and part failure. Most problems come from wrong tool choice, bad setup, or poor chip control. Knowing what to watch for helps you avoid costly mistakes.
Broken Tap Head
Tap breakage is often caused by too much force or misalignment. Using a dull tap or applying incorrect feed can also snap the tool.
To prevent breakage:
Rough or damaged threads come from dull tools, wrong speed, or poor lubrication. This weakens the thread and affects fit.
Fix it by:
Chips can jam inside blind holes or around the tap. This stalls progress and ruins the thread. It can also snap the tool.
Prevent clogging by:
If the tap doesn’t match the hole or thread spec, threads may be too loose or too tight.
To fix this:
If the tap enters at an angle, the threads will be uneven. This causes fastener misfit or cross-threading.
To avoid misalignment:
There is precision demanded in every step during tapping. A single error may break threads, ruin tools, or wreck the part. Whether you are a manual or a CNC worker, these are the best practices that make risk the lowest and quality the highest.
Quality drill has to fit the thread size always. Excessively, the small hole increases torque and breaks taps. Too big, then the threads come out superficial and weak.
Apply an adequate tap drill chart. Select the drill according to the type of material and the thread class. Before starting tapping, check manners.
When tapping, the pressure is applied in a small space. The tap gets dull without lubrication as friction accumulates quickly. This causes a bad thread finish and wear of the tool.
Apply oil-based cutting fluid to steel or stainless steel. Aluminum can be treated with paste or light oil. Have the tap always coated,--particularly when in a blind hole.
One of the quickest ways of destroying threads is misalignment. Anything as little as angles generates cross-threading or drag. You will also experience difficulties with increased resistance and a possibility of breaking the tool.
To tap, manually apply a tapping guide or block. In the case of CNC, verify the tool centerline and tool holder location. The tap must go directly in and feed smoothly.
Let the tool do the work; do not push it. Compulsory tapping contributes to more wear and results in bad threads. Using power tapping, the feed must be at the pitch of the thread.
When it is done manually, turn slowly and back out frequently. To maintain a clear cut, break chips every few turns. On CNC, feed-per-rev s can be used that are rated to your tap geometry.
Examine the completed threads to check whether they have burrs or damage. A thread gauge or other fastener can be used to assure the fit. Tool wear, or wrong setup, usually evidences itself by poor threads.
Also, inspect the tap to see whether it is dull edged, chipped, or worn. Clean threads are made by a sharp tap with not so much force. Change old tools before they old tools lead to damage.
Tapping works best when the process is controlled and consistent. A small mistake can damage threads or break the tap. Follow these key steps before, during, and after tapping to avoid problems and improve results.
Never use a tap of a different type than the thread and hole. Threads should be started by using a taper tap. General-purpose jobs should be done with a plug tap. When full threads are required near the bottom of the hole, use a bottoming tap.
Inspect the tap material, finish. The common one is high-speed steel. Apply coated taps or carbide tools on hard materials such as stainless steel. Worn taps should be avoided: it is hard to cut with them, and they can snap.
The size of the drill has a direct influence on the thread. One that is too small results in high cutting force and tap breakage. An oversized hole results in loose ends and poor pressure.
You can use a tap drill chart and locate the proper size of your type of thread and material. Ensure you have a sharp drill and that it is straight. In harder metals, undersized drills can assist, although tapping torque must remain safe.
A tap that makes a wrong angle will cut threads unevenly or will jam. The tap should be fixed in line with the hole center line. In CNC installations, the toolpath provides alignment. On manual work, use a guide or tap block.
Turn the tap gently. Do not over-push/tilt it in. Even minor misalignment causes additional wear, reduces the lifetime of the tool, and destroys the thread.
Tapping generates a lot of pressure, particularly in blind holes. The friction accumulates quickly when there is no lubrication. This makes the tool hot, blunts the tool, and forms rough threads.
Select the fluid that suits your material- cutting oil in the case of steel, paste in the case of aluminum, and tapping wax in the case of soft alloys. Reapply fluid frequently, particularly in deep or tight holes. The result is cleaner cuts and longer tool life, with better lubrication.
Once tapped, check the quality of threads. Apply a thread gauge, go/no-go plug, or test fastener. Check to see whether it is chipped or whether it has rough edges and shallow threads.
Clear the hole of clean chips and fluid. Before using the tap again, check it to see whether the edges are dull or there are cracks. Once you notice wear, change the tool so you do not end up with bad threads on the next part.
Tapping is a key process in any machine shop. It creates strong, accurate threads—if done right. Success depends on choosing the right tap, drilling the correct hole size, using lubrication, and staying aligned. Each step must be precise. One small mistake can break a tap or ruin a thread.
Whether you're working by hand or with CNC, following best practices helps you save time and avoid rework. Good setup, clean tools, and proper feed rates make a big difference. Always inspect your threads and tools after cutting. This keeps your parts consistent and your tools in good condition.
What’s the best drill size for tapping?
It depends on your thread pitch and material. Use a tap drill chart to find the correct hole size. If the hole is too small, the tap can break. If it’s too large, the threads will be weak.
Can I use the same tap for different materials?
Only if the materials are similar. Softer metals like aluminum and brass need sharp taps. Harder alloys may need coated or carbide taps. Using the wrong tap increases wear and lowers thread quality.
How do I avoid tap breakage in blind holes?
Use a spiral flute tap to pull chips out of the hole. Apply proper lubrication and back off often if hand tapping. In CNC, match the feed rate to the tap pitch. Always drill deep enough for full chip clearance.
What causes rough or damaged threads?
Common causes include dull taps, misalignment, poor lubrication, or the wrong hole size. Always check the tap’s condition. Keep the tool straight, apply cutting fluid, and drill the correct pilot hole.

Aluminum Heat Sinks: Process, Techniques & Applications

Aluminum Car Parts: Benefits, Techniques, and How to Source

CNC Medical Machining: Process, Techniques & Applications

Complete Automotive Machining Guide: From Discontinued Parts to Custom Solutions

Custom Automotive Parts: Methods, Challenges & Choosing the Right Manufacturer

What Is a Vacuum Casting Service? Techniques, Process, & Applications